10 Tips to Better Photos With Your iPhone
Nowadays it seems so easy to take a good photograph, right? With all the integrated technology in smartphones, we don’t even need to handle an actual camera anymore. Well, at least we can say this about image quality… But what about the photography composition, technique, etc.?
Indeed, this evolution has created a dispute within photographers’ community: but whether you are a self-called photographer, an amateur or a professional one, there’s always room for improvement. In this brief article, I’ll give you 10 iPhone photography tips that will make you feel like a professional.
1. Try different angles
© Nick Page – Flickr.com
This advice is also valid for users who are into other devices as well. Since we hold our phone at a certain height (mostly from chest or neck height), the majority of the everyday pictures taken will look similar, at least in that sense. The first step to create better, more creative pictures with an IPhone (or again, with any other device that is capable of shooting pictures) is to try different angles.
Something that works really well with simple compositions, for instance, is low angle pictures. Just make sure you shoot from a much lower height – at least lower than your hip. Another trick that usually gives great finishes is shooting almost from floor height. If you have an IPhone 6 or higher, you won’t have any problem with dirt or water on the floor.
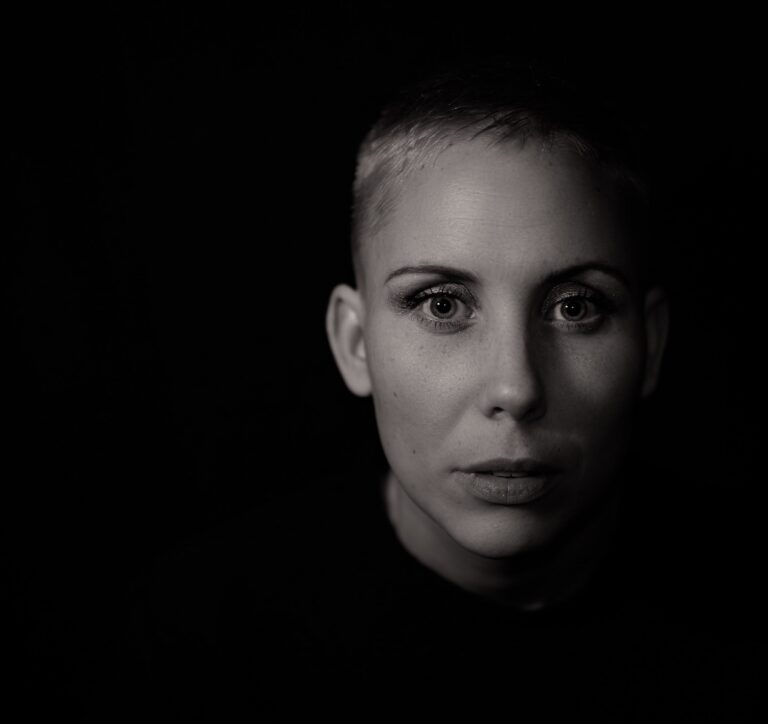
2. Light is key
In both cameras and smartphones – especially IPhones – light is a key element for a good quality picture. You can try it yourself: try taking a picture with dim or little light, and then go outside and have a well-illuminated environment. You will notice a grainy effect in your dark pictures as soon as you are reviewing it.

©John VanderHaagen – Flickr.com
This happens in most photographic devices as well. In cameras, you can usually modify your ISO levels and be a bit more confident about results. Although you can do this in your IPhone as well, it will be a little less effective. So it’s always better to have a good lightning overall.
You can use natural light, as well as artificial light. Nowadays there are many comfortable items to improve lightning in your smartphone photography – or well, in your selfies.
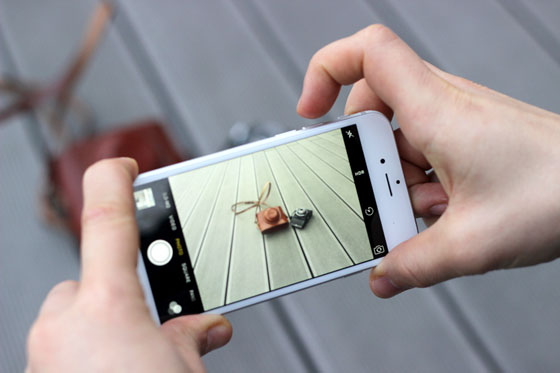
3. The only zoom allowed is you, literally getting close to the subject
This might come like an obvious tip, but many people forget this detail: when you zoom in a picture, image quality suffers an important loss. Important IPhone photography tip: If you want to get a good photograph, do not use the digital zoom in IPhones.
4. Sometimes the simpler the better
Composition is probably the most important element of a good photograph. In fact, we can contemplate a picture with a less than decent image quality if the subject is interesting enough.
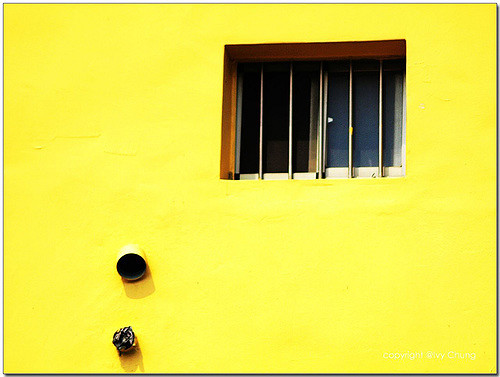
© Ivy Chung – Flickr.com
One of the best ways to try a good composition is trying negative space and a simple, single subject. We call “negative space” to the “empty” part of the picture: everything that is not the main subject. A picture of a chair can turn out to be more mesmerizing than a picture of the whole dining room, in this sense.
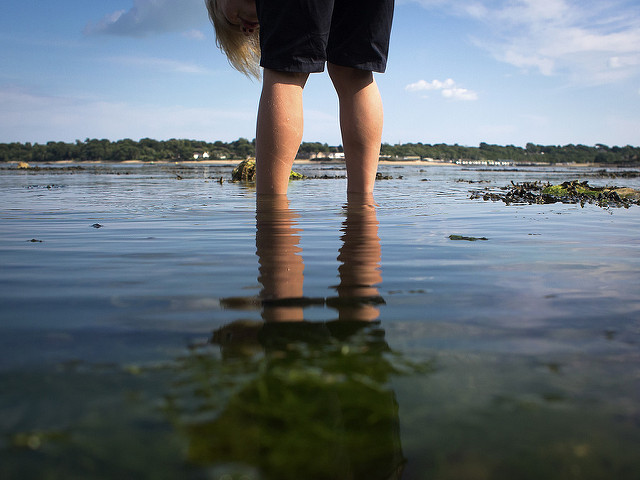
5. Introduce some depth
A good way to introduce depth in your photographs is precisely shooting pictures at something that offers that sensation, such as a bridge, a road, a curved shore… Something that gives the feeling of a tridimensional scenery. You can also use some objects or subjects to create an interesting foreground, which also creates a depth feeling.
6. Focus and exposure lock
When you try to capture a new photograph with your IPhone, you have surely noticed that the “lightning” or focus are constantly changing once you move your phone around. This is because the camera is trying to let you know the best (according to its criteria) exposure value and focus point for that particular scene, based on a wide number of elements.
However, that criteria is not always the best. For more creative finishes, you can actually tell the camera to lock exposure and focus permanently (for the time the camera app is being used). To do this, just tap and keep it up for a while until a number of rectangles start acting around your tapped spot. This will keep the focus in a specific area of the scene and the exposure as well.
7. Reduced shakes
One of the main issues of using an IPhone – or any phone, at that – is the continuous shaking despite their optical stabilization system. And if we don’t have enough stability, shakes become a problem because they translate into blurry results.

© Jonathan Kos-Read – Flickr.com
Although IPhones have significantly improved over the years (starting with IPhone 6) and have allowed users to have a better control of involuntary vibrations while taking shots, there are still ways to reduce the chance of moving even more.
A classical way is to rest your elbows on a surface. But within the phone you can apply the self-timer. A two second self-timer will allow you to have some time to get it together once you have pressed the shutter. So once the countdown ends, take a deep breath and get a strong grip.
8. A cheap, external shutter
Did you know you can shoot pictures with your IPhone earphones? That’s right: along the cable of your earphones you will find two little buttons for volume. With these, you can actually shoot the camera when you are in the camera app, which is a great advantage if you don’t own an external shutter or a tripod to get some stability. In fact, you can use the physical volume buttons on your phone to shoot as well.
The point is that you could use this as an external shutter, while you place your phone in a stable, non-moving surface. Next step? Preparing for a clear result.
9. Save original photos if you are planning to add filters or the HDR effect
Usually when you apply filters or HDR effect on the photograph you take, the camera will save this change over the original picture. However, there’s a way to solve this.
You can go to settings, then to Photo and Camera and check the save the original photo option. This way, if you mess up while applying a filter or the High Dynamic Range, you’ll be able to have the original photo to try different settings and increase the number of possibilities.
10. Use the Rule of thirds composition grid
You have probably discovered this grid by now, but let’s anyway confirm its use: the Rule of thirds is some sort of guide to make you understand how your future photograph is going to be composed. If you have little to no knowledge of photography, you may think that placing your subject in the center would be a great idea (or was it just me?)
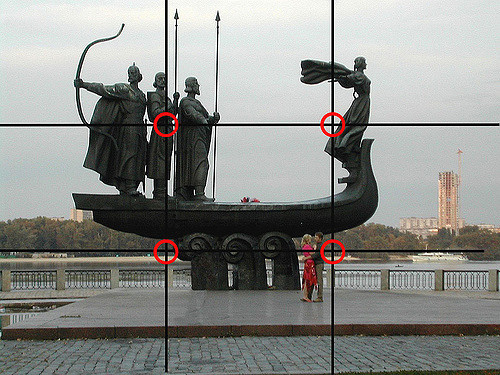
© Michael Miller – Flickr.com
Anyway, the point of the grid is trying to guide you through your composition and there are several ways to use it: you can place a horizon under or along the bottom horizontal line, you can place eyes on the two superior points, you can place standing people or structure on the vertical lines…
Remember you don’t have to actually use or follow the grid every time – it’s all about fun and creativity. But it is useful when you are a bit lost within your composition or else you want to refresh your perspectives.
Whether you apply all or a few of these tips, it will be a great improvement in your photography skills. Ready to master your IPhone’s camera yet?