Understanding Depth of Field for Beginners
Depth of Field is a fundamental concept in photography. To understand depth of field we have to take an example first. Let’s take any image that you have taken recently. Take a careful look at it. Do the entire image appear sharp in focus? No? Then how much of it is actually in focus? Quite a bit? But not quite the whole of the image? Well, the extent of the image that is in acceptable focus is known as the depth of field. In other words the area of the image that is acceptably sharp is known as depth of field.
Depth of field can be adjusted and varied from one image to the other. It depends essentially on the image and the result that the photographer is looking to achieve. A landscape image, for example, require one to have a large depth of field. It essentially means that the image need to have a large part of the composition sharp in focus. Conversely, an image of a flower isolated from its background require that you blur out the background. A large part of such an image will be out of focus. The same goes for a small subject like a wedding ring, or even a subject which is a little bigger, a face.
What parameters control depth of field?
Depth of field is controlled by a number of parameters. Here we shall learn about a few of them.
Aperture
Probably the single most important parameter that controls depth of field of your images. Aperture refers to the size of the opening of the lens on your camera. Aperture is a small hole at the front end of every lens. The size of the hole determines how much light enters the camera at any given moment. However, the same parameter also determines another aspect and that is depth of field.
Larger the size of the aperture shallower is the depth of field. Conversely, smaller the aperture larger is the depth of field. A large aperture is represented by a small f-number. Conversely a smaller aperture is represented by a big f-number. F/1.4, f/1.8 or f/2 are large apertures (despite the small relative f-numbers). Conversely, f/8, f/11 and f/16 are smaller apertures (despite the large relative f-numbers).
A larger f-number when combined with one or more of the following techniques explained in this tutorial can produce a vast depth of field. Let’s take an example.

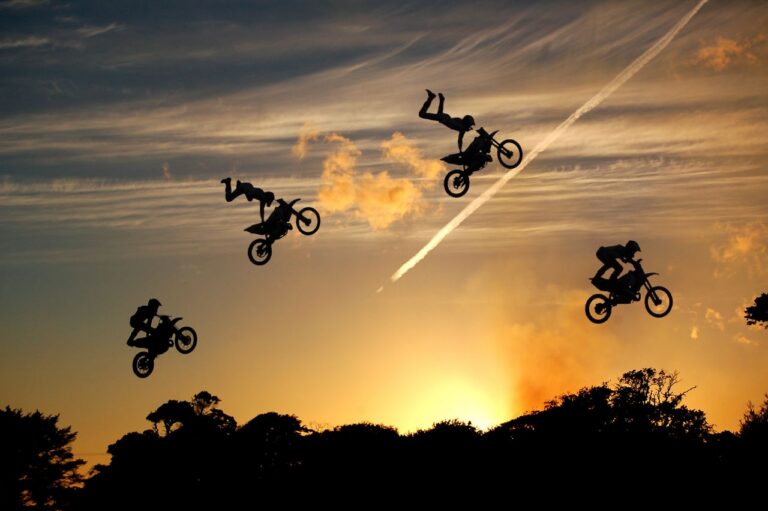
This image represents a reasonably large depth of field. It is achieved by stopping the lens down to a very large f-number (small aperture) and by asking the subject to sit further away from the camera (a technique explained below). The result is a large depth of field. Much of the foreground is in focus as well as some of the background.

Comparatively, the next image is shot with a large aperture (small f-number) and probably from a close distance to the subject, rather than using a long lens and then shooting from further away. The result is that the background remains very far from the subject and thus is out of focus. Plus, the use of a small f-number ensures that much of the frame outside the point of focus is also blurred. All this put together creates a small depth of field. If you notice carefully, some of her hair on the left of her face is out of focus. Thus, it is presumed that the depth of field is a mere few centimeters.
Shallow depth of field is used to selectively focus on certain aspects and highlight them in the final image. Take a look at this image below –
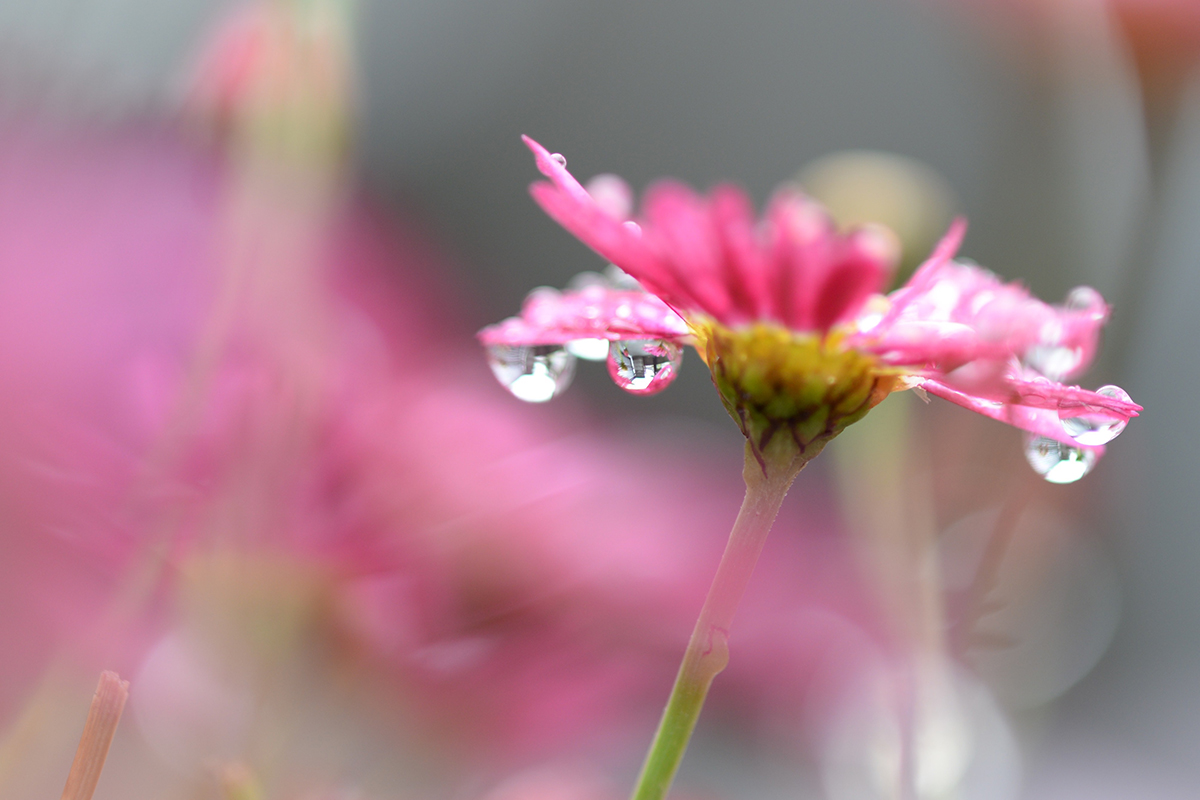
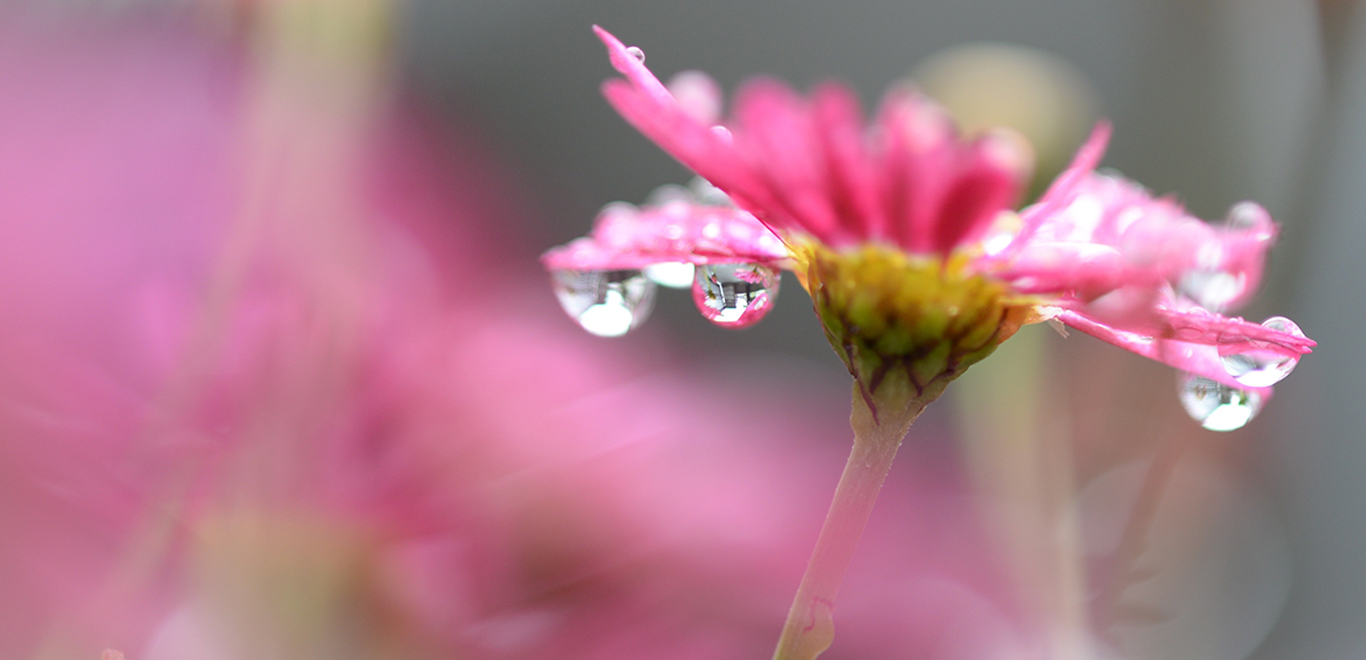
This image is a good example of how a photographer can use the technique of selective focusing to highlight a small aspect of an image. In this image above, the small f-number (and resulting small depth of field) is utilized to highlight drops of water on the flower. As a matter of fact the point of focus is the second drop from left.
Subject to camera distance
The second important parameter for depth of field is subject to camera distance. Subject to camera distance denotes how far away the subject is from the camera / lens. The further the subject is from the camera, larger is going to be the depth of field. Conversely, when the subject to camera distance is small depth of field will be shallower.
This concept is used when shooting landscapes and or environmental portraits or even architecture. The subject along with the background are both required to be in acceptable focus. This is achieved by using a small aperture and taking a few steps back or asking the subject to take a few steps back.

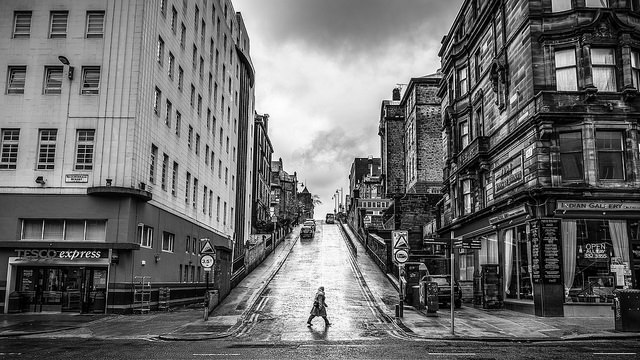
In the above image the subject is standing at a very close distance to the camera. Resultantly, all of the background is out of focus.

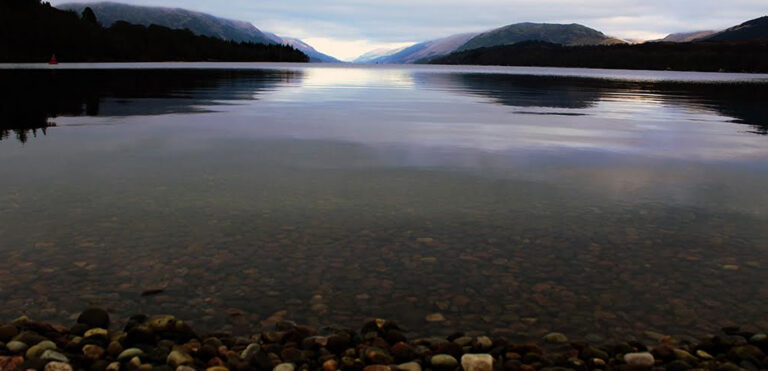
The above image is an example of a landscape scene, something that is associated with a vast depth of field. Invariably when a photographer shoots such an image the subject is much further away and a wide angle lens is used. But apart from those details a small aperture (large f-number) is a must. A small aperture ensures much of the frame is in focus.
Subject to background distance
Similarly, the distance from the subject to the background is also important. The closer the subject is to the background, more will be the depth of field. In other words both the subject and the background will fall almost on the same plane of focus. This is achieved better when combined with standing further away from the subject / background.

The above is an example. The subjects in the image, the child and the dog are sitting against a fence. There is no space between them and the fence resultantly putting them on the same plane of focus. Resultantly, the whole of the image is in focus here.
Focal length
Focal length is yet another important aspect that governs depth of field of your images. Wide angles, in other words, the use of short focal length lenses results in a larger depth of field than compared to tele lenses (or using long focal length).
While we are discussing focal length it is pertinent to consider yet another aspect; sensor size. Sensor also has a bearing on the depth of field of your images. Larger the sensor, shallower is the depth of field. However, this aspect is fixed once you have committed yourself to a platform / brand. You can’t change that every image. But you can do that using a zoom lens.
Focusing distance
Focusing distance is also an important parameter that governs the depth of field of your images. Let’s say you have a landscape scene with a human subject standing about 10 feet from you. If you focus on the human subject much of the background will be out of focus. Alternatively, if you focus on the background, the subject will be out of focus. This you already know by now. When you are adjusting focus of your lens you are basically altering the distance at which your lens is focusing. Some lenses have focusing distance marker on them. This marker is very useful. Most new lenses don’t have this marker.
There is something called Hyperfocal Distance in photography. Hyperfocal distance is that distance which maximizes the depth of field of your images when focused at. It changes according to the particular lens and camera (sensor size) that you are using along with a few other parameters. It is a difficult calculation to be done out in the field. The Hyperfocal distance is calculated based on a complicated amount of data. It involves the focal length of the lens, camera sensor size, aperture selected and subject to camera combination. The best solution would be to print a chart that gives you the values like a ready reckoner.
When the lens is focused at the hyperfocal distance half of the distance between the plane of focus to the camera and all the way up to infinity would be in acceptable focus. You would probably have heard some photographers say selecting a small aperture and then focusing one thirds into the frame from the bottom tend to give the maximum depth of field. It is not the most accurate of methods to get a large depth of field. Focusing at the hyperfocal distance, if you can manage to keep a chart with you, is the best and the most scientific method for getting maximum depth of field.